Constructing a Dashboard
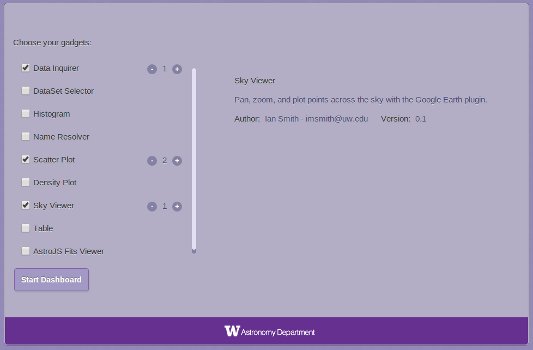
After navigating to the ASCOT start page, dashboards can be created a few different ways. To generate a dashboard using the default list of gadgets, select 'quick dashboard'. Otherwise, you can choose which and how many gadgets to add to the dashboard using the 'create dashboard'. This will take you to the create dashboard screen.

You will be presented with a list of available gadgets. Clicking on the name of a gadget will present a short description and a link to more detailed documentation about it. To pick a gadget to add to the dashboard, click the checkbox next to it. A pair of + and - arrows will appear next to the name, which allow you to specify how many of that gadget to add to the dashboard. Once you are finished making you selection, click 'start dashboard' to be taken to the newly generated dashboard.
You can also generate dashboards by communicating with the ASCOT backend. For more information, see the Rest API.
Data Sets
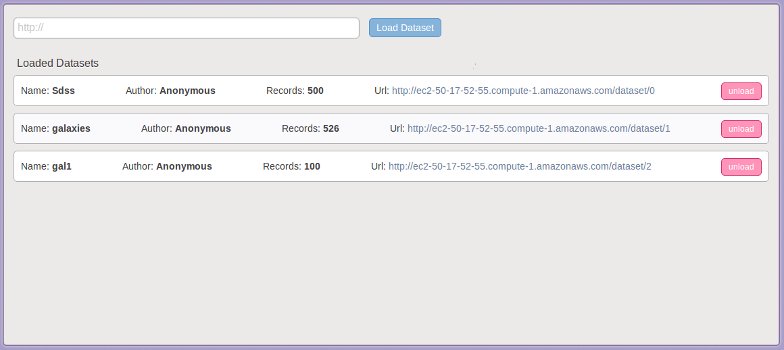
Each dashboard keeps track of its own group of data sets. After being generated, data sets are stored on the server and can be modified in different ways using gadgets. To view information about all of the datasets associated with the current dashboard, click the 'data sets' button to the left of the main dashboard window.

The URL for each data set will take you to the JSON text for the data set. You can load your own data set in JSON format by providing a URL to it in the input box at the top of the data set window and clicking 'load dataset'. To disassociate a data set from the current dashboard, click the 'unload' button. Note that this does not remove the data set from the server. The data set can be added back to the dashboard by providing the URL to it and clicking 'load dataset' again.
Dashboard States
Any modifications that you make to gadgets or data sets on a dashboard are immediately saved to the server. You can close your browser at any time and navigate back to a dashboard to find it in the exact same state. In addition, other users can see modifications that you make to a dashboard in real time.
The undo/redo buttons above the dashboard window allow you to easily step forward and back through any changes that you make. Clicking the 'fork' button will create a copy of your dashboard in its current state at a new URL, which you will immediately be taken to.
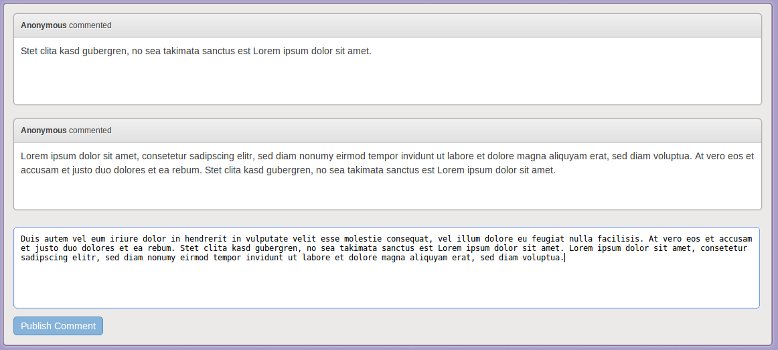
Clicking the discussion tab takes you to a list of comments which users have added about your dashboard. Comments are also persistent and will be copied when you fork a dashboard.
